Introduction
Learning how to sew a zipper is one of those sewing skills that looks intimidating until you actually try it. Staring at a broken zipper and wondering how to sew a zipper without ruining your favorite garment? You are not alone.
This skill turns out to be pretty simple once you break it down. Whether you are fixing a jacket, finishing a skirt like the wool midi skirts we cover on Curvy Workwear, or adding a zipper to a bag, the process follows the same basic steps. In this guide, you will learn how to sew a zipper on clothes, how to do it by hand, and how to do it with a sewing machine. No fancy tools or years of experience needed. Just a little patience and the right steps.
What You Need Before You Sew a Zipper
Before you sew a zipper, gather your supplies. Having everything ready saves time and stops you from stopping mid-project to search for a missing tool.
Basic Supplies
- A zipper that matches your fabric length and color
- Matching thread
- Sewing machine (optional) or a hand needle
- Straight pins or fabric clips
- Fabric scissors
- Iron and ironing board
- A seam ripper (just in case)
Choosing the Right Zipper
Not all zippers are the same. Metal zippers work well for jeans and heavy fabric, similar to the denim pieces covered in our baggy jeans fit guide. Plastic coil zippers are lighter and better for dresses, skirts, and bags. Always pick a zipper slightly longer than your opening. You can shorten a zipper, but you cannot make it longer. For a deeper look at zipper parts, teeth types, and how sliders work, Threads Magazine’s zipper primer is a solid reference.
How to Sew a Zipper on Clothes: Step-by-Step
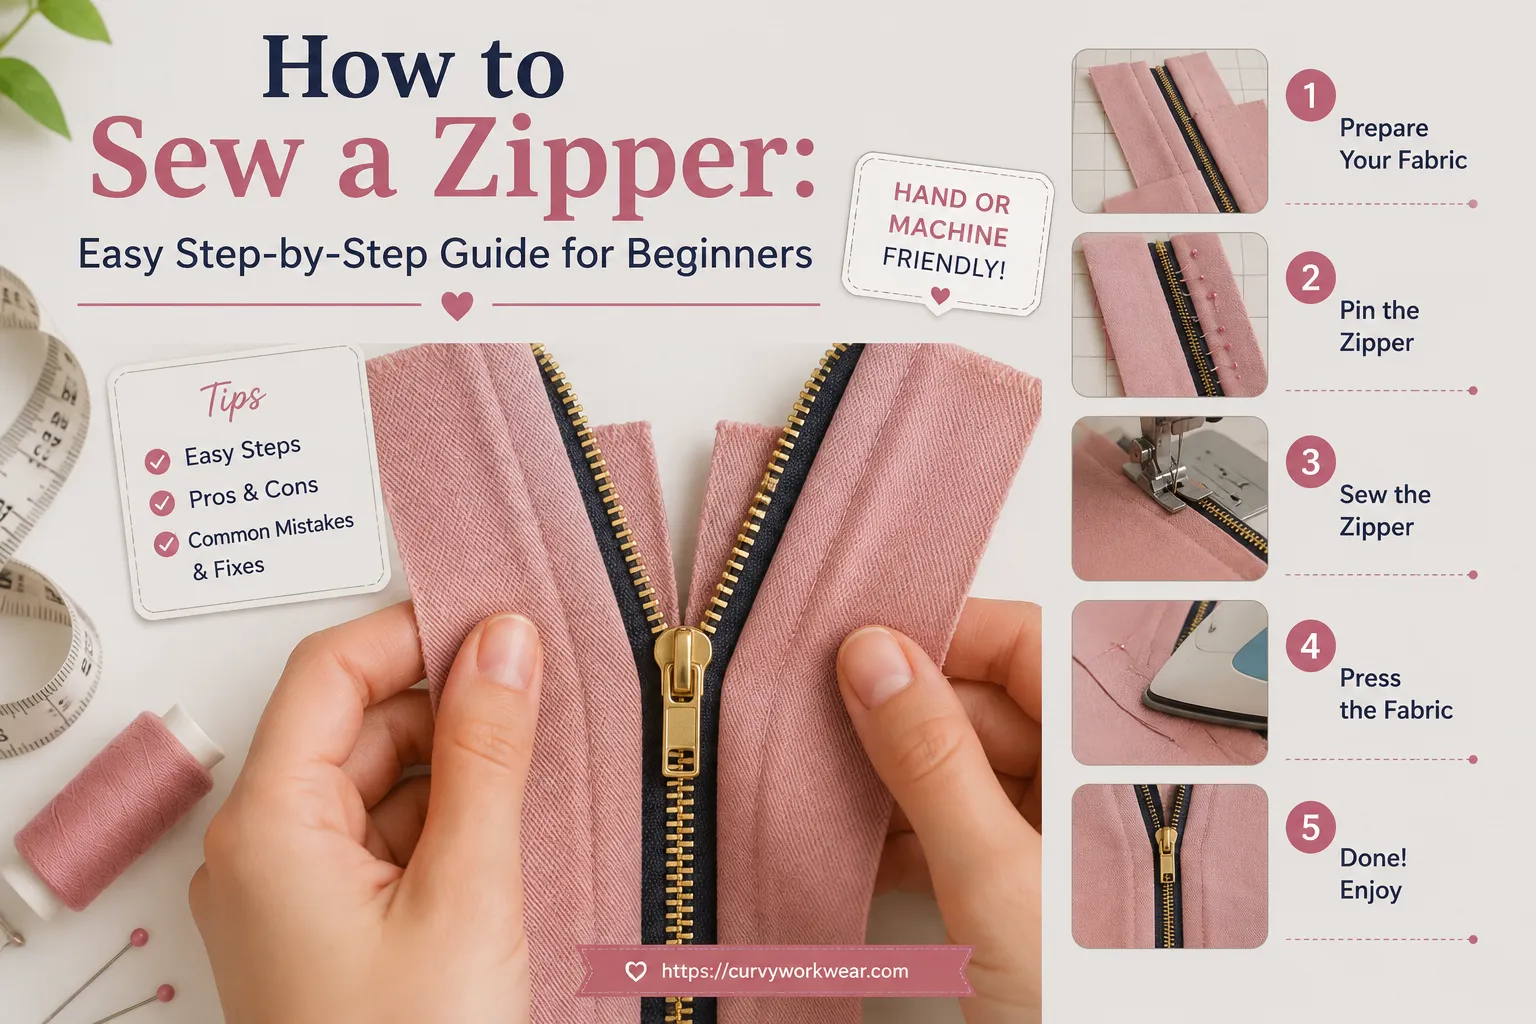
This method works for skirts, dresses, trousers, and most clothing projects. It is often called the “lapped zipper” method, and it is one of the most beginner-friendly ways to sew a zipper into a garment.
Step 1: Prepare the Fabric Opening
Sew your garment seam up to the point where the zipper will start. Leave the zipper opening unsewn. Press the seam allowance open with an iron so it lies flat.
Step 2: Pin the Zipper in Place
Place the zipper face down on the seam allowance, with the zipper teeth centered on the seam line. Pin it in place. Make sure the fabric edges meet without gaps or overlaps.
Step 3: Baste the Zipper
Basting means sewing loose, temporary stitches to hold the zipper before the final stitch. Use a long stitch length by hand or machine. This step is optional but highly recommended for beginners, since it stops the zipper from shifting.
Step 4: Sew the Zipper Permanently
Switch to a zipper foot on your machine if you have one. Sew close to the zipper teeth, moving slowly. Stop with the needle down, lift the presser foot, and turn corners carefully instead of forcing the fabric. SINGER’s official guide to the zipper foot explains this attachment in more detail if your machine came with one.
Step 5: Remove Basting Stitches
Once the final stitching is done, pull out the basting thread. Press the area gently with an iron, avoiding direct contact with the zipper teeth, since heat can warp plastic zippers.
How to Sew a Zipper by Hand
Not everyone has access to a sewing machine, and that is completely fine. Hand-sewing a zipper takes longer, but the result can look just as neat.
Step 1: Thread Your Needle
Use a strong thread and double it for extra durability. Knot the end so it does not slip through the fabric.
Step 2: Pin and Baste First
Just like the machine method, pin the zipper in place before sewing. This step matters even more for hand sewing, since it is easy for fabric to shift without a machine holding it steady.
Step 3: Use a Backstitch
A backstitch is strong and holds up well over time. Sew small, even stitches close to the zipper teeth, working from the bottom of the zipper to the top.
Step 4: Check Your Stitches as You Go
Every few stitches, open and close the zipper to make sure it moves smoothly. It is much easier to fix a problem now than after the whole zipper is sewn in.
Advantages and Disadvantages of Hand Sewing a Zipper
Advantages:
- Gentler on delicate fabrics like silk, chiffon, or lace, which can snag under a machine needle
- No machine needed, so it works anywhere, even on a plane or during travel repairs
- Gives you full control over stitch placement on tricky curves
Disadvantages:
- Takes much longer than machine sewing, often triple the time
- Stitches can look less even if your hand tension varies
- Not ideal for heavy fabrics like denim, canvas, or upholstery material
How to Sew a Zipper with a Sewing Machine
If you have a sewing machine, this method is faster and gives a cleaner finish for most fabrics.
Step 1: Attach a Zipper Foot
A zipper foot is a small attachment that lets the needle sew close to the zipper teeth without hitting them. Most machines come with one, or you can buy one separately for a low cost.
Step 2: Set Your Stitch Length
Use a medium stitch length, usually around 2.5 to 3mm. Too short, and the stitches look bunched. Too long, and the seam may not hold well.
Step 3: Sew Slowly Along the Zipper
Guide the fabric gently. Do not pull or push it through the machine, since this can cause crooked stitching. Sew one side of the zipper, then the other, keeping your stitching line straight.
Step 4: Reinforce the Ends
At the top and bottom of the zipper, sew a few extra stitches back and forth. This is called a bar tack, and it stops the zipper from pulling loose after repeated use. A detailed walkthrough of this basting-to-stitching process, including photos of each stage, is available on Make It and Love It’s zipper tutorial.
Advantages and Disadvantages of Machine Sewing a Zipper
Advantages:
- Much faster than hand sewing, often done in under 15 minutes once you know the steps
- Stitches are more even and consistent, which gives a cleaner, professional look
- Handles heavy fabrics like denim and canvas far better than hand stitching
Disadvantages:
- Requires access to a sewing machine and often a zipper foot attachment
- Delicate fabrics can pucker or snag if you sew too fast
- Slightly steeper learning curve for beginners who are new to machine settings
Common Zipper Sewing Mistakes (And How to Fix Them)
Even experienced sewers run into zipper problems sometimes. Here are a few common ones.
Puckered Fabric
This happens when the fabric bunches up under the stitches. It is usually caused by sewing too fast or not basting first. Slow down and baste next time.
Crooked Stitching
If your line wanders away from the zipper teeth, it is often because the fabric was not pinned evenly. Use more pins, spaced closer together, especially around curves.
Zipper Teeth Are Sewn Shut
This is a frustrating but common mistake. It happens when stitches accidentally catch the zipper teeth instead of just the fabric. Use a seam ripper carefully to remove the stitch, then try again with a zipper foot.
Tips for a Professional-Looking Zipper
- Always test your stitch on a scrap fabric piece first
- Press your fabric before and after sewing for a cleaner look
- Match your thread color closely to the fabric, not the zipper
- Go slow around corners; rushing causes most mistakes
- Keep the zipper closed while sewing, when possible, to keep it straight These small habits make a big difference between a homemade look and a store-bought finish. For general style inspiration once your garment is finished, our style guides section has more outfit ideas worth browsing.
FAQ: How to Sew a Zipper
Is it hard to sew a zipper for the first time?
It can feel tricky at first, but it gets easier with practice. Most beginners get comfortable after sewing two or three zippers. Starting with a simple project, like a pillow cover, helps build confidence.
Can I sew a zipper without a zipper foot?
Yes, but it is harder to sew close to the teeth without one. A zipper foot is inexpensive and makes the whole process much smoother, so it is worth getting if you plan to sew zippers often.
What is the easiest zipper method for beginners?
The lapped zipper method, covered earlier in this guide, is usually the easiest for beginners. It hides raw edges well and does not require precise matching like an invisible zipper does.
How long does it take to sew a zipper?
For a beginner, sewing a zipper usually takes 20 to 40 minutes, including pinning and basting. With practice, this time drops significantly.
Can I hand sew a zipper into jeans?
Hand sewing a zipper into jeans is possible, but difficult due to the thick denim fabric. A sewing machine is strongly recommended for heavier fabrics like denim.
Conclusion
Learning how to sew a zipper is a skill that pays off again and again, whether you are mending old clothes or starting new sewing projects. The key steps stay the same: prepare your fabric, pin carefully, baste if needed, and sew slowly. Whether you choose to sew a zipper by hand or with a machine, practice is what turns a shaky first attempt into a clean, professional finish. Grab some scrap fabric, an old zipper, and give it a try today.
Disclaimer: This guide is for general informational and educational purposes only. Sewing machine settings, zipper types, and fabric behavior vary by brand and project, so always check your machine’s manual and test on scrap fabric before working on your final garment. Curvy Workwear is not responsible for any damage to fabric, garments, or equipment resulting from following this guide.