Introduction
Clean makeup sponges help create smoother makeup application and better results. How to clean makeup sponges properly is important for removing makeup residue, dirt, and buildup.
In this guide, you will learn simple steps to clean, dry, and store makeup sponges. You will also learn how clean sponges can support smoother makeup application.
What You Need to Clean Makeup Sponges
You only need a few simple items to clean makeup sponges properly.
Gentle Soap or Makeup Sponge Cleanser
Use a gentle soap or cleanser made for makeup tools. Avoid harsh products that may damage the sponge.
Clean Water
Use lukewarm water to wet and rinse the sponge. Lukewarm water helps loosen makeup residue without being too harsh on the sponge. Rinse it thoroughly to remove soap and leftover makeup.
Clean Towel
Use a clean towel to remove extra water after rinsing. A fresh towel also helps keep the sponge clean.
How to Clean Makeup Sponges Step by Step
Cleaning your makeup sponge regularly helps remove makeup, oil, and product buildup. You can also learn more about caring for a Beautyblender makeup sponge in our detailed review.
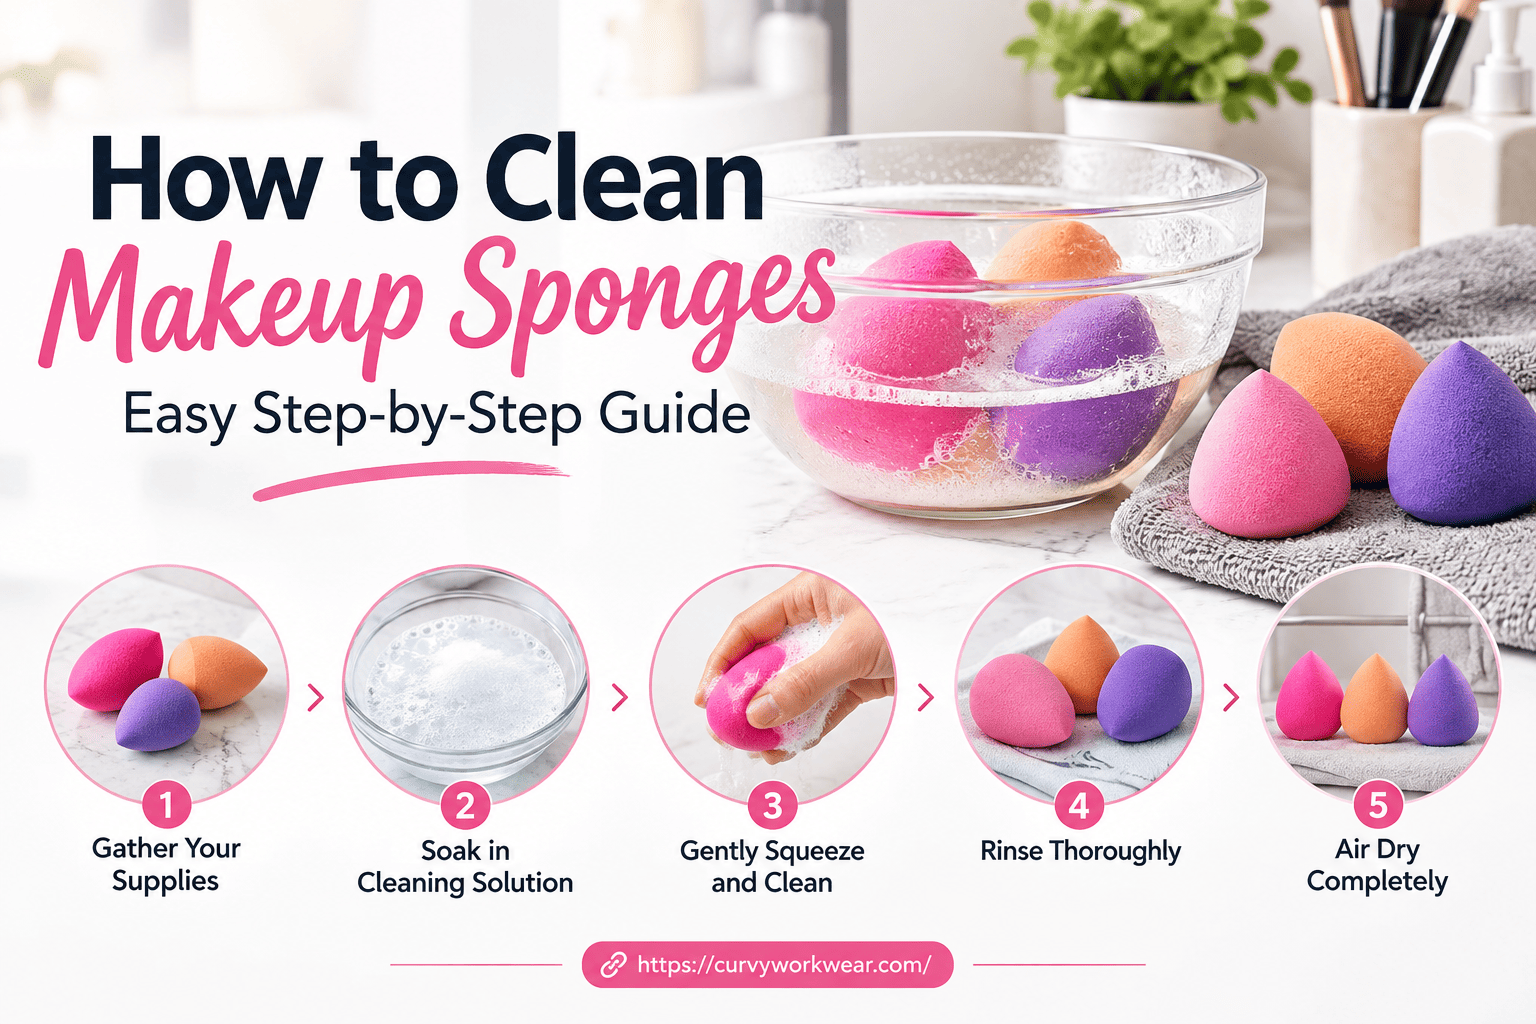
Wet the Sponge
Hold the sponge under lukewarm running water until it becomes fully wet. Gently squeeze it several times while soaking.
Apply Cleanser and Massage
Apply a small amount of gentle cleanser to the wet sponge. Massage it gently to loosen makeup residue.
Rinse the Sponge Thoroughly
Rinse the sponge under clean running water until the water runs clear. Keep squeezing gently to remove leftover cleanser and makeup.
Squeeze and Dry the Sponge
Gently squeeze out excess water without twisting or pulling the sponge. Place it on a clean towel and let it air dry completely.
How Often Should You Clean Makeup Sponges?
Regular cleaning helps remove makeup residue, oils, and buildup from the sponge.
Daily Cleaning
Clean your makeup sponge after each use when possible. This prevents makeup from building up inside the sponge.
Deep Cleaning
Give your sponge a more thorough cleaning regularly. Deep cleaning helps remove makeup that stays trapped inside.
How to Remove Stubborn Makeup From Sponges
Some makeup products can leave stains after several uses. Use these steps to clean them.
Remove Foundation and Concealer
Apply cleanser directly to areas covered with foundation or concealer. Gently massage those areas until the makeup starts loosening.
Clean Dark or Dried Makeup Stains
Soak the sponge with lukewarm water and apply gentle cleanser. Massage stained areas carefully without pulling or tearing the sponge.
Repeat the Cleaning Process if Needed
Rinse the sponge and check for remaining makeup stains. Repeat the cleaning steps until the sponge is thoroughly clean.
How to Dry and Store Makeup Sponges
Proper drying and storage help keep your makeup sponge clean between uses. Keeping makeup tools clean can also support a healthy skincare routine when using makeup regularly.
Let the Sponge Air Dry
After washing, gently squeeze out excess water. Place the sponge somewhere clean and well-ventilated to dry completely.
Store It in a Clean, Dry Place
Keep your dry sponge in a clean, well-ventilated place. Avoid storing it with dirty makeup tools or products.
Avoid Storing a Wet Sponge
Never put a damp sponge inside a closed makeup bag. Trapped moisture can encourage mold and bacterial growth.
When Should You Replace a Makeup Sponge?
Replace your sponge when cleaning no longer restores its condition or performance.
Signs of a Damaged Sponge
Look for tears, cracks, unusual odors, mold, or major texture changes. These signs mean you should replace the sponge.
How Long Makeup Sponges Usually Last
There is no single lifespan for every makeup sponge. Beautyblender recommends replacing its sponges about every three months.
Frequent use or visible damage may require earlier replacement. Some well-maintained sponges can last longer.
Conclusion
Cleaning makeup sponges regularly helps remove makeup, oil, and product buildup. Wash them gently and rinse them well after use.
Let your sponge air dry completely before storing it in a clean place. Replace it when you notice tears, odors, or other signs of damage.
Disclaimer: This article provides general information about cleaning and caring for makeup sponges. Cleaning methods may vary depending on the sponge material and care instructions.
Always follow the manufacturer’s cleaning instructions when available. Stop using the sponge if it becomes damaged, develops mold, or causes skin irritation.