You had a great week with your press-on nails, but now it’s time to remove press-on nails safely instead of ripping them off. Maybe they’re chipping, lifting at the edges, or you just want a change. Ripping them off feels tempting. It’s also risky.
Learning how to remove press-on nails safely is easier than it looks. You don’t need a salon visit or fancy tools. With a little patience and the right method, you can take them off without hurting your natural nails underneath.
This guide walks you through every method step by step, from soap and water to acetone, plus a professional-level removal system most guides skip. The steps below reflect advice from board-certified dermatologists at the American Academy of Dermatology and tips shared by professional manicurists, combined with common at-home methods that actually work.
Why You Should Never Just Pull Press-On Nails Off
The most common mistake is grabbing an edge and yanking it straight up.
Press-on nails are usually attached with adhesive tabs or nail glue. Pulling them off forcefully peels away layers of your natural nail along with them. The result is thin, weak, painful nails that can take months to grow back.
Here’s what happens when you rip them off:
Your natural nail plate can crack or split The nail bed underneath may feel sore or tender Nails become thinner and more prone to breaking later The skin around the nail can sometimes tear too
A celebrity nail artist put it simply in an interview about press-on removal: forcing them off is exactly what damages your natural nails underneath.None of it is worth saving just a few minutes. Slow and steady wins here.
What You’ll Need Before You Start
A bowl of warm (not hot) water Mild soap or dish soap 100% acetone for glued nails — it works better than acetone-based polish remover, which is diluted with other ingredients Cotton balls or pads Aluminum foil or nail clips for the soak method A cuticle pusher or orangewood stick (never metal tweezers) Cuticle oil or hand lotion for aftercare
A tip most guides skip: add 2–3 drops of cuticle oil directly into your soapy water. This helps break down the adhesive faster while keeping your skin and nails from drying out during the soak.
If you used adhesive tabs, you may not need acetone at all. Both situations are covered below.
Method 1: Removing Press-On Nails Applied With Adhesive Tabs
Tabs are designed to be less permanent than glue, so they come off more easily.
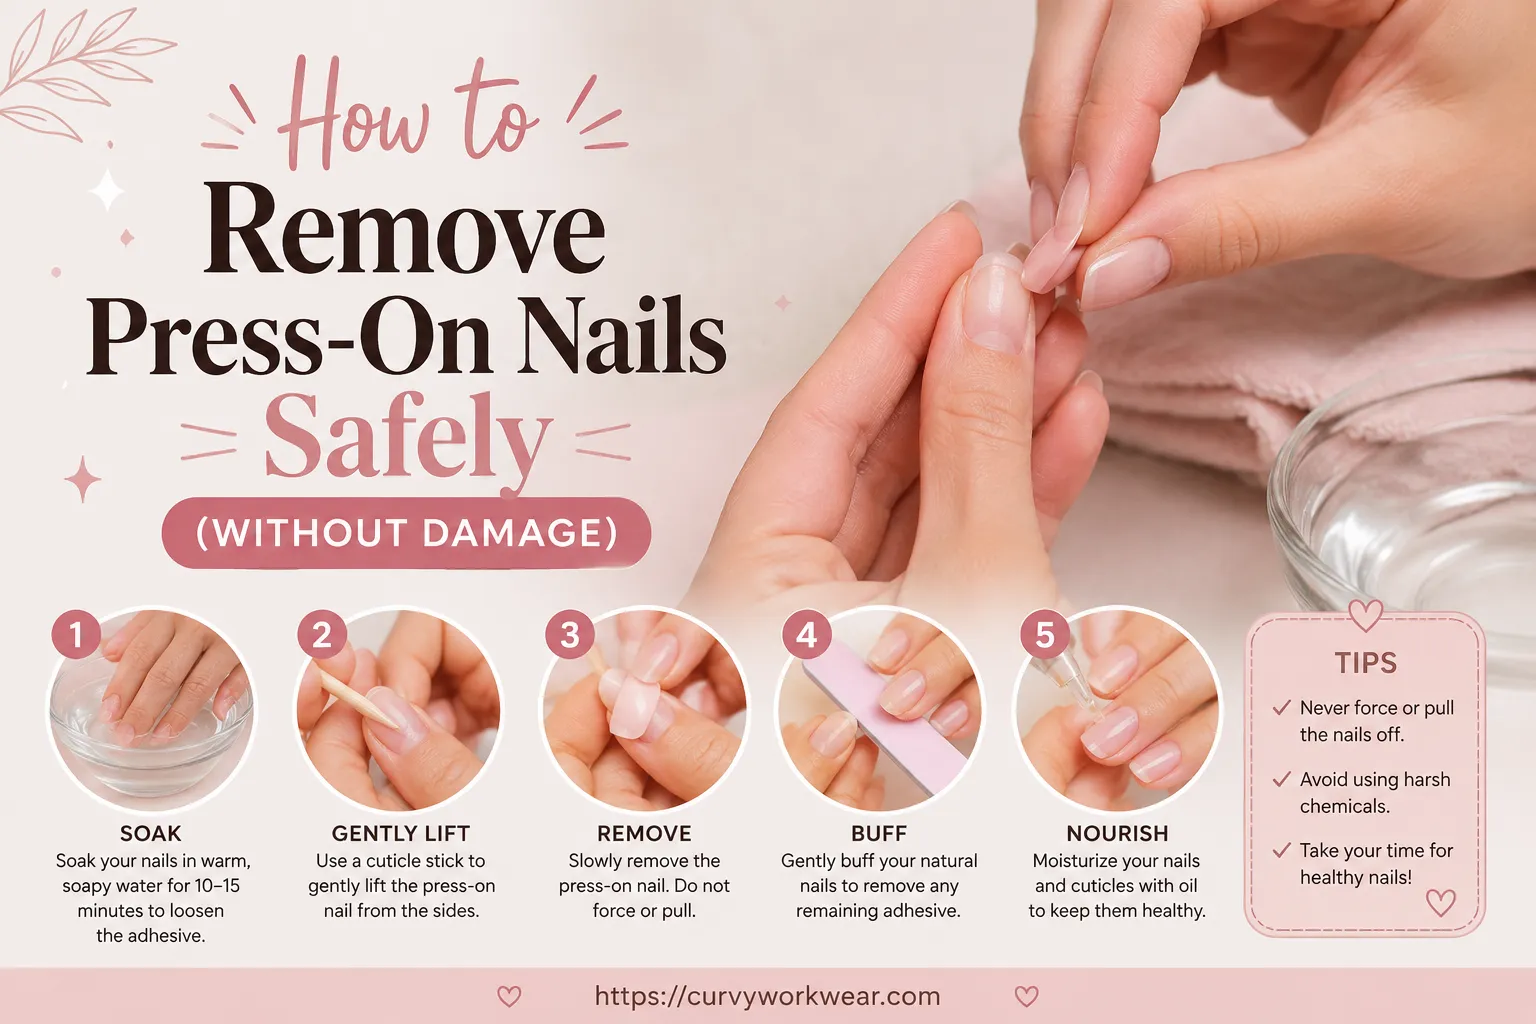
Soak your hands in warm, soapy water for 10–15 minutes. Gently wiggle one nail from side to side. Never pull straight up. Use a cuticle pusher to slowly lift the edge, working from the sides toward the center. If it resists, soak for a few more minutes and try again.
Most tabs let go fairly easily once softened by water. If a nail truly won’t budge, don’t force it. Move on to the acetone method instead.
Method 2: Removing Press-On Nails Applied With Nail Glue (Acetone Soak)
Glued nails need acetone to break down the bond. It’s the same process nail technicians use for acrylics and gel nails.
Work in a well-ventilated area. Acetone fumes are strong. Trim the press-on nails as short as possible so the acetone can reach the glue faster. Soak a cotton ball in 100% acetone and place it on top of each nail. Wrap each fingertip in foil (or use nail clips) to hold the cotton in place. Leave it on for 15–20 minutes, with 10–15 minutes as an absolute minimum. Unwrap and gently push at the edges with a cuticle pusher. The press-on should slide off with light pressure. If it doesn’t come off easily, rewrap and soak for another 5–10 minutes.
Think of acetone as a slow eraser. It doesn’t rip the glue away instantly — it softens it bit by bit. Patience is the real tool here. Healthline’s medically reviewed guide recommends the same soak times, plus moisturizing right after since acetone is very drying.
How to Remove Press-On Nails Without Acetone
If you have sensitive skin or dry nails, acetone can feel too harsh. Try these gentler alternatives instead.
Warm soapy water soak. Works best for tab-applied nails. Soak for 10–15 minutes, then gently lift from the edges. Repeat the soak if needed.
Oil-based soak. Olive oil or cuticle oil loosens glue over time. Soak nails in warm oil for 15–20 minutes before attempting removal. It’s slower, but much gentler on your skin.
Dental floss technique. For nails that are already partially lifted, slide unwaxed dental floss under the edge and gently move it side to side to break the bond. This only works once the glue has already started to loosen, so it pairs well with a prior water or oil soak.
A Lesser-Known Method: The Professional “Removal System”
If you use press-ons often and want a more controlled, less messy approach, this is closer to what salon-style removal products use.
Lightly file off the top shiny layer of the press-on nail so remover liquid can penetrate faster. Soak a removal sponge (or cotton) in an acetone-based press-on remover. Wrap the soaked sponge over your fingertip like a small cap. Let it soak for at least 10 minutes. Use a wooden cuticle pusher to gently push the press-on off.
This method is more precise than a full soak because only the top of the nail is exposed to acetone, which reduces skin contact.
Advantages and Disadvantages of Each Removal Method
Every method to remove press-on nails involves a trade-off between speed, gentleness, and whether you can reuse the nails afterward. Here’s a quick side-by-side look.
Warm soapy water soak
Advantages: gentlest on skin and cuticles, no harsh chemicals, press-ons often survive intact for reuse Disadvantages: slower, may not fully release nails applied with strong glue
Acetone soak
Advantages: fast and reliable, breaks down even strong nail glue, closest to a professional removal Disadvantages: drying to skin and nails, strong fumes, usually ruins the press-ons so they can’t be reused
Oil-based soak
Advantages: very gentle, keeps nails and cuticles moisturized during the process Disadvantages: the slowest option, not strong enough for heavily glued nails
Professional removal system
Advantages: more controlled and less messy, limits acetone contact with skin Disadvantages: requires extra products (removal sponges, remover liquid) that basic methods don’t need
If your nails feel intact and lightly applied, start with soap and water or oil. Save acetone for nails that are stubborn or fully glued down.
Troubleshooting: What If a Nail Won’t Come Off?
Sometimes one or two nails are more stubborn than the rest. If that happens:
Soak it a bit longer in your chosen method Make your soapy water slightly hotter, but still comfortable, never scalding If using the oil method, try a different oil If glue residue remains, gently buff it, use a swab of nail polish remover, or soak in warm water for 10 minutes
Never force it. A few extra minutes of soaking is always better than a torn nail.
Aftercare: What to Do Once the Nails Are Off
Removing the press-ons is only half the job. Your natural nails need a little care afterward.
Clean and moisturize. Wash your hands to remove leftover glue residue, then apply cuticle oil and hand lotion. Acetone especially dries out skin and nails.
Buff gently, don’t file hard. If glue residue remains, use a soft buffer lightly. Aggressive filing thins out the nail plate.
Give your nails a break. If your nails feel weak or thin after removal, go polish-free for a few days to let them recover. The American Academy of Dermatology’s nail care tips also recommend keeping nails clean, dry, and protected from too much water while they recover.
Use a strengthening treatment. If you wear press-ons or acrylics frequently, your nails can naturally weaken over time. A nail-strengthening base coat and regular breaks between sets help a lot.
Once your natural nails have recovered, you may want a fresh look before your next set. If you’re weighing longer-lasting options, our gel nails guide and builder gel nails guide cover how those compare to press-ons. And if you’re picking a new style, our nail shapes guide can help you choose one that suits your hands.
Can You Reuse Press-On Nails After Removing Them?
It depends on which method you used.
Soapy water or oil method. Press-ons often survive intact and can be reused. Just clean off the old adhesive and reapply with a fresh tab or a small dab of glue.
Acetone method. Press-ons are usually ruined and can’t be reused, since acetone also breaks down the plastic itself.
If reusing them matters to you, stick with the soap or oil method.
When to See a Doctor
Home removal is safe for most people, but consult a doctor or dermatologist if you notice:
Redness, swelling, or pus around the nail (signs of infection) Nails that feel unusually painful or sensitive Deep ridges, splitting, or visible tissue damage Burning or a rash-like allergic reaction
Don’t ignore these signs. Catching them early prevents bigger problems.
Common Mistakes to Avoid
Skipping the soak. Trying to peel off dry, unsoaked nails almost always causes damage. Using metal tools aggressively. A metal cuticle pusher can gouge the nail if used too hard. Rushing the process. Rushed removal is the main cause of nail damage. Ignoring aftercare. Skipping moisturizer after acetone exposure leaves nails and cuticles dry and brittle. Wearing press-ons back-to-back with no break. Frequent use naturally weakens nails, so a gentler soapy-water method is often more suitable than repeated acetone soaks.
FAQs
How long does it take to remove press-on nails safely? Usually 15–30 minutes, depending on the method. Acetone or glue removal tends to take a bit longer since the soaking step needs more time.
Can I reuse press-on nails after removing them? Yes, in many cases, especially with the soap or oil method. Clean off the old adhesive and reapply with a new tab or a small dab of glue.
Will removing press-on nails damage my natural nails? Not if done the right way. Damage usually comes from pulling too fast or skipping the soak step, not from the press-ons themselves.
What if a press-on nail won’t come off at all? Soak it a little longer. Some nails, especially those glued very securely, need repeat rounds of soaking. Never force it.
Does dish soap actually remove press-ons? Yes. It’s a great substitute for acetone if you have sensitive skin, peeling cuticles, or brittle nails, since it’s far less harsh and drying.
Is home removal safe, or should I see a professional? For most people, home removal is completely safe when done correctly. If your natural nails are already damaged, brittle, or painful, a nail technician can help remove them more carefully.
Conclusion
Knowing how to remove press-on nails the safe way protects your natural nails and saves you from unnecessary pain. Whether you used tabs or glue, remember the core principle: soak first, never pull, and always moisturize afterward.
Whether you go with a simple soapy-water soak or the professional-level removal system, patience is the one tool you really need. Give your nails a short breather, then try your next press-on look whenever you’re ready.
Disclaimer: This article is for general informational purposes only and doesn’t replace professional medical or cosmetic advice. Nail sensitivity, allergies, and skin conditions vary from person to person. If you experience pain, infection, or an allergic reaction during or after nail removal, stop and consult a doctor, dermatologist, or licensed nail technician.